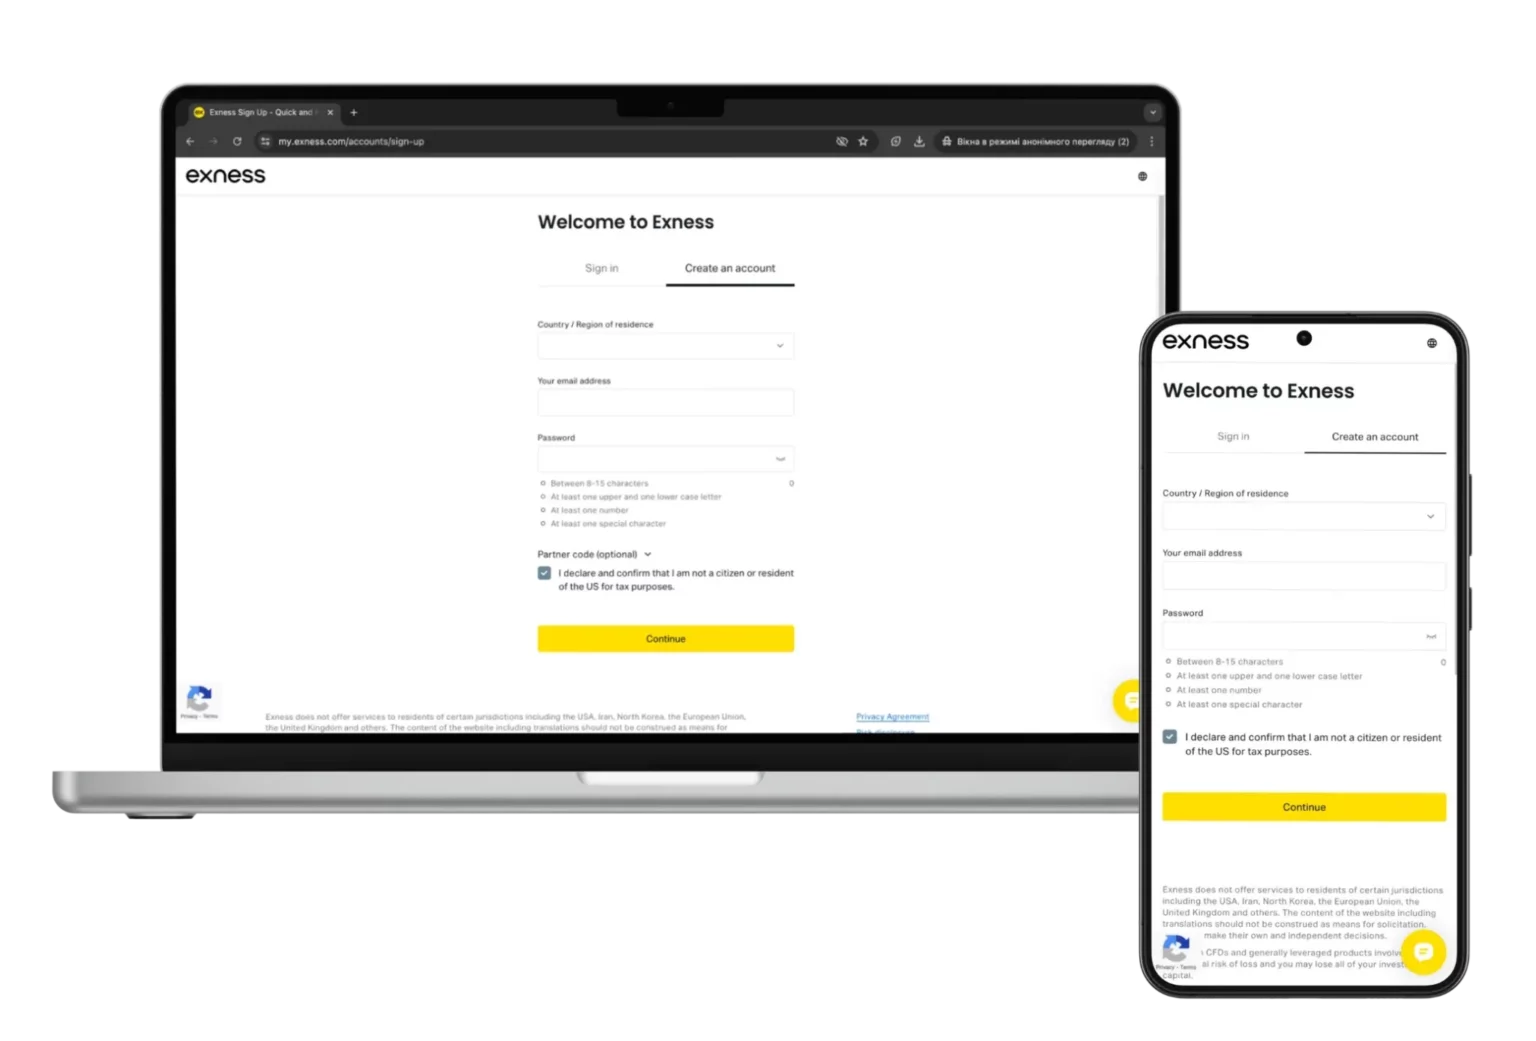
- How to Sign Up for an Exness Account
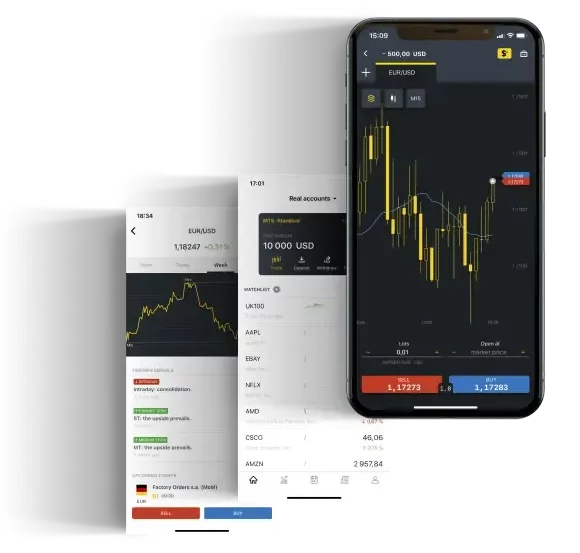
- Setting Up Exness Through Mobile App
- Exness Identity Verification Process
- Picking the Best Exness Account Type
- Comparing Different Exness Account Options
- Understanding Exness Real and Demo Accounts
- Real Account vs Demo Account – What’s Different
- Adding Money to Your Exness Account
- Common Problems During Sign-Up and How to Fix Them
- Frequently Asked Questions (FAQs)
How to Sign Up for an Exness Account
Creating your Exness trading account takes just a few minutes. Follow these steps to get started:
Visit the Exness Website
- Use your web browser to go to Exness’s official site.
- Look for the “Sign Up” or “Create Account” button on the main page and click it.
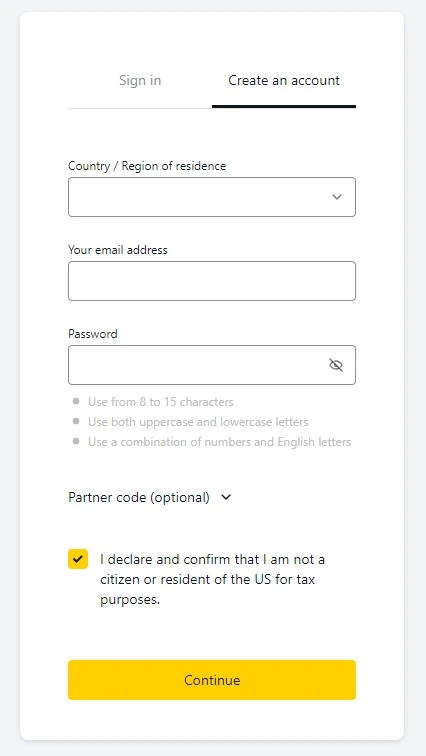
Complete the Sign-Up Form
- Type your complete name exactly as shown on your ID documents.
- Add a valid email address where you can receive messages.
- Make a strong password and type it again to confirm it.
- Pick your home country from the list provided.
- Check the boxes to accept their terms and privacy rules.
Verify Your Email
- Exness will send a message to your email inbox after you submit the form.
- Find this email and click the activation link inside to enable your account.
Prove Your Identity
- You’ll need to send clear photos of your ID and proof of address to use all features and make withdrawals.
- Use your account dashboard to upload these documents.
- Wait while they check your papers and approve your account.
Setting Up Exness Through Mobile App
Trading on your phone is convenient, so registering through the mobile app might work better for you. Here’s the process:
Get the Exness App
- Go to your phone’s app store – Google Play for Android phones or App Store for iPhones.
- Search for “Exness” and download the official app from the broker.
- Tap install and wait for it to finish downloading to your device.
Create Account in App
- Launch the Exness app on your mobile device.
- Find the “Sign Up” button on the opening screen and tap it.
- Fill in your personal details like name, email, and create a password.
- Choose your country and agree to their service terms.
- Tap “Create Account” when you’re done entering everything.
Check Your Email
- Look in your email for a message from Exness containing an activation link.
- Tap this link to finish setting up and activate your new account.
Complete Identity Check
- Once your account is active, you need to verify who you are.
- Open the “Profile” section in the app and select “Verification.”
- Follow the steps to upload photos of your ID and address documents.
Start Using Your Account
- After verification is complete, you can access everything the app offers – depositing money, making trades, and studying market data.
- Explore the app’s features to improve how you trade.
Exness Identity Verification Process
Verifying your identity with Exness is required to unlock all platform features and withdraw your money. Here’s how to complete this process:
Proving Who You Are
- Getting to the verification page: Sign into your Exness account and find “Profile Settings” or “Verification” in the menu.
- Sending your ID: Upload a clear scan of your identification document. You can use a passport, driving license, or national ID card.
- Picture quality matters: Make sure the image is sharp and you can read all details clearly. It must show your name, birth date, photo, signature, and when the document expires.
- Submitting documents: Use the verification form on their website or mobile app to upload your ID.
Confirming Where You Live
- Address proof documents: Send a document that shows where you live, like a utility bill, bank statement, or property document. It must be less than three months old.
- What the document needs: Your full name and address must be visible, plus the date it was issued.
- Uploading proof: Send a scan or photo through your account dashboard.
Waiting for Approval
- Review time: After you upload everything, Exness will check your documents. This usually takes a few hours but might take several days.
- Getting results: They’ll email you or notify you in your account when verification is finished.。
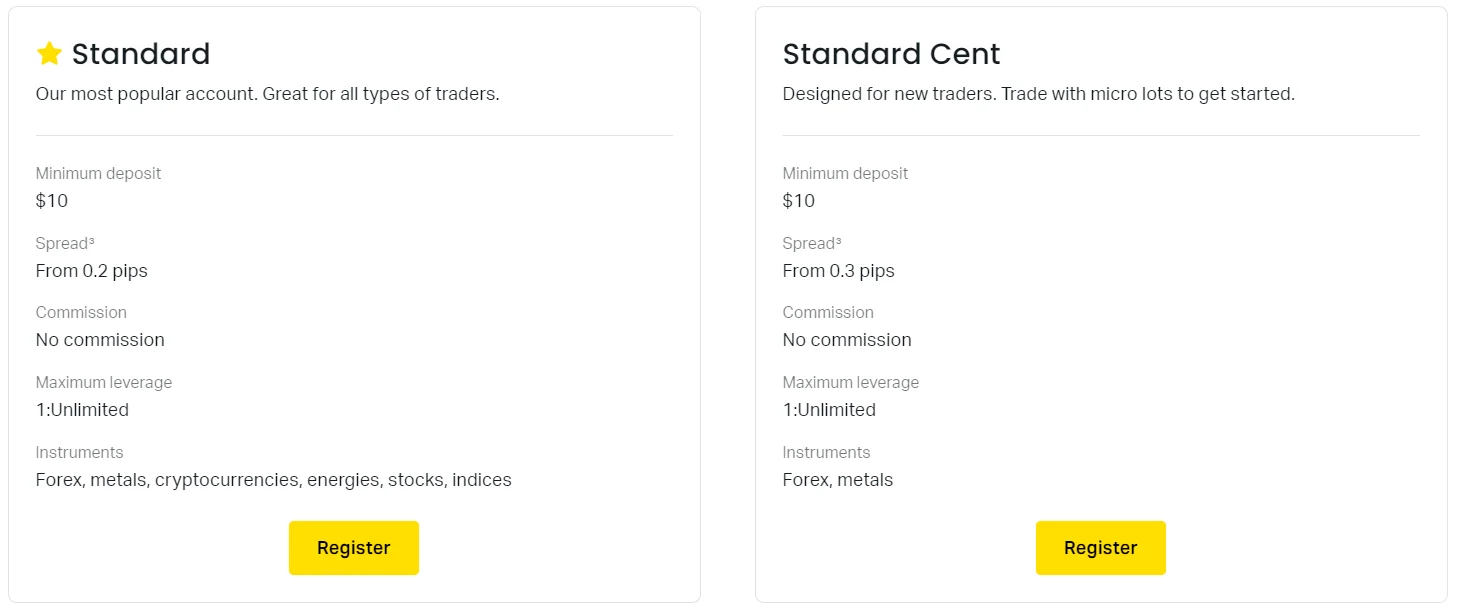
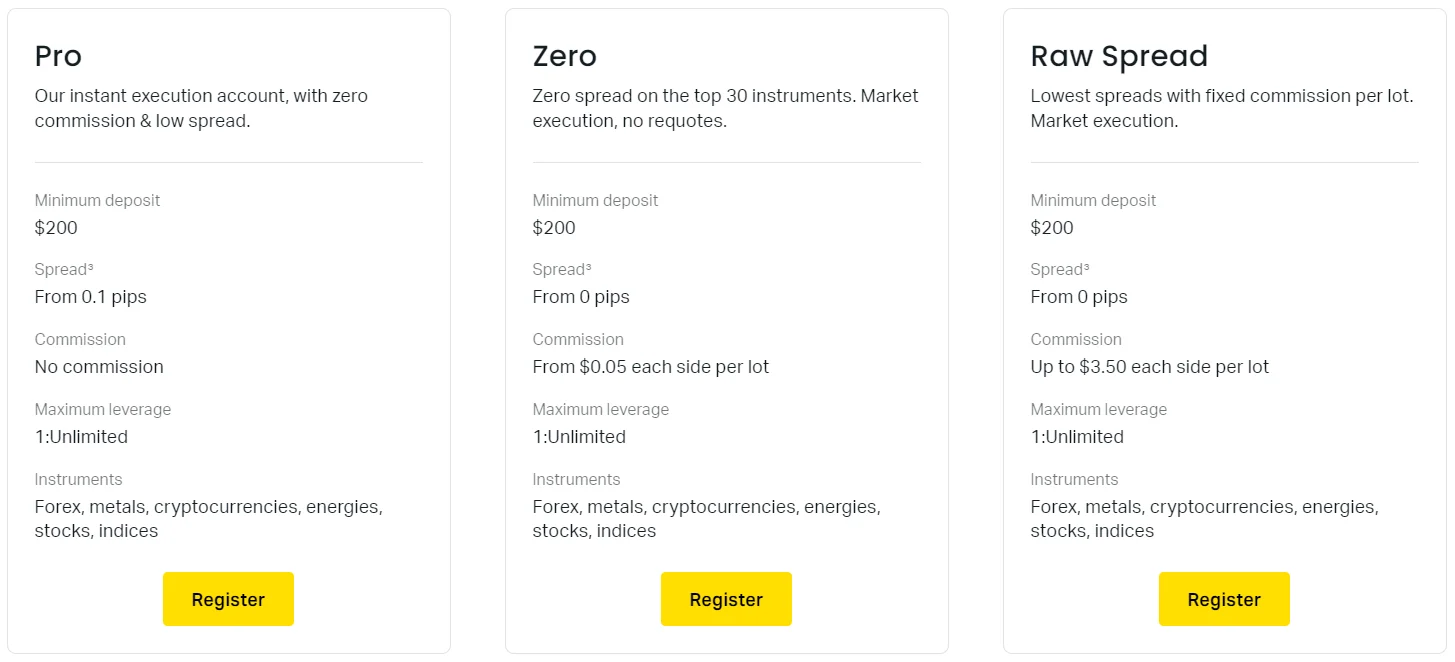
Picking the Best Exness Account Type
The right account type depends on how you like to trade, your experience level, and what strategy you use. Exness offers several account types, each with different features and benefits. Here are the main options:
Standard Accounts
These accounts work well for most people, especially those new to trading. They have simple fees and give you access to many trading instruments.
- Standard Account: Great for beginners because you don’t need any minimum deposit. Trading costs start at 0.3 pips with no extra fees per trade.
- Standard Cent Account: Perfect if you’re just learning to trade and want to keep risks small. You trade in cents instead of full currency units.
Professional Accounts
These accounts are made for experienced traders who want better leverage and lower trading costs.
- Professional Account: Lower trading costs starting at 0.1 pips without additional charges. Works well for experienced traders who need good pricing and fast trade execution.
- Raw Spread Account: Very low costs starting from 0.0 pips but with a small fee per trading lot. This works better for scalpers and people using automated trading systems.
- Zero Account: Combines low costs with minimal fees per trade. Great for traders who trade based on news and like to close positions quickly.
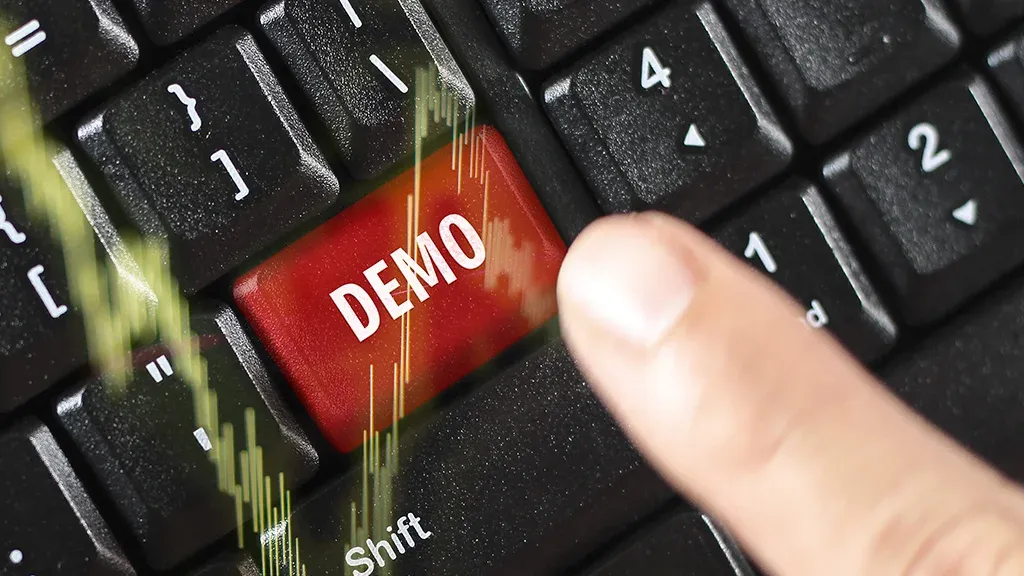
Demo Account
Don’t forget about the demo account that lets you practice without using real money. It’s an excellent way to learn the platform, test different strategies, or just get better at trading.
Comparing Different Exness Account Options
Pick the account that works best for your trading style and experience level.
| Feature | Standard Account | Professional Account |
| Starting deposit | Just $1 (changes based on how you pay) | Higher requirement, begins at $200 |
| Trading costs | Start at 0.3 pips and change with market conditions | As low as 0.0 pips on some account types |
| Extra fees | No additional charges | Small commission or based on how much you trade |
| Borrowing power | Up to 1:2000 leverage available | Up to 1:2000 with more options |
| Best for | New traders who want simple setup and experienced traders too | Skilled traders wanting better pricing and deeper market access |
Understanding Exness Real and Demo Accounts
Real accounts need your own money and let you trade with actual cash. Practice accounts give you fake money to learn and test without losing anything real.
Setting Up a Real Trading Account
- Sign up: Create your account on the Exness site by completing their form.
- Prove identity: Upload ID and address documents to verify who you are.
- Add money: Put funds in using any of their accepted payment methods.
Creating a Demo Account at Exness
- Pick practice mode: Choose the demo account option on their website.
- Set preferences: Pick what type of account you want and how much virtual money to use.
- Start learning: Begin practicing with fake funds without any risk.
Real Account vs Demo Account – What’s Different
- Money risk: Live accounts use your real money, practice accounts don’t risk anything.
- Learning: Practice accounts let you explore everything without losing money, real accounts need careful thinking.
- How it works: Trading prices might be slightly different, but the platform works the same way.
Adding Money to Your Exness Account
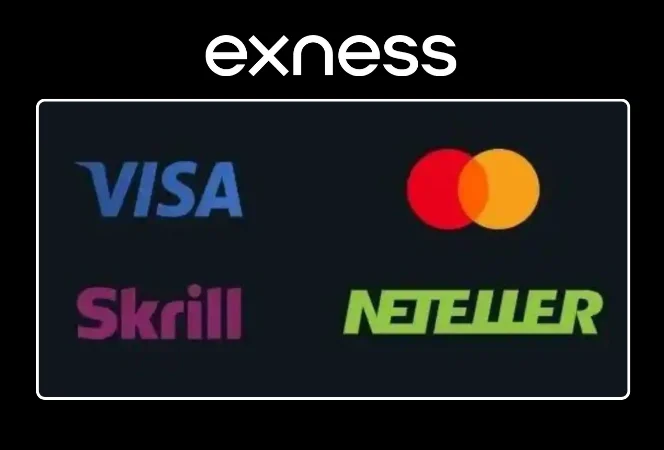
- Exness Payment options: Fund your account with bank cards, online wallets, and other payment systems.
- How to deposit: Log into your account, click “Add Funds,” choose amount and method, then follow the payment steps.
Ways You Can Deposit Money
Exness gives traders around the world many funding options for easy and flexible deposits:
- Credit and debit cards (Visa, MasterCard)
- Online payment services (Skrill, Neteller, WebMoney)
- Direct bank transfers
- Local payment methods based on where you live
Step-by-Step Deposit Process
- Sign in first: Use the main website or mobile app to log into your Exness account.
- Find deposit area: Look for “Wallet” or “Add Money” in your account menu.
- Pick payment method: Select how you want to pay and enter the needed details.
- Set deposit amount: Type in how much money you want to add.
- Complete payment: Follow the instructions from your chosen payment service.
- Check your balance: After processing, the money should show up in your trading account.
Common Problems During Sign-Up and How to Fix Them
Sometimes people run into issues when creating brokerage accounts. Here are the most frequent problems and how to solve them:
Email Confirmation Problems
- No email received: Look in your junk mail folder first. If it’s not there, ask for another confirmation email or call customer service.
- Link doesn’t work: Check if the email is still valid. These links often expire after some time. You might need to request a fresh email.
Identity Check Problems
- Documents get rejected: Make sure your photos are clear and you can read everything easily. Check that your documents haven’t expired and match what Exness needs.
- System problems: If it seems like a technical issue, try uploading through a different web browser or device.
Login Problems
- Can’t remember password: Use the “Reset Password” option on the login page. They’ll send you a link to make a new password.
- Account is blocked: If your account gets locked (maybe because of unusual activity), contact support to find out why and what to do next.
Frequently Asked Questions (FAQs)
How much time does signing up take?
Creating an account only takes a few minutes. But finishing the full verification process, including confirming who you are and where you live, might take anywhere from a few hours to several days. This depends on how busy their support team is.